WooCommerce Plugin
概要
elepay はWooCommerce専用のPluginを提供しています。
プラグインのインストール
elepay for WooCommerce pluginのインストール方法を紹介します。
- Plugin のダウンロード
以下のリリースページから、最新のpluginをzip方式でダウンロードしてください。
elepay for WooCommerce
📘 ダウンロード済みのzipファイルを解凍しないでください。
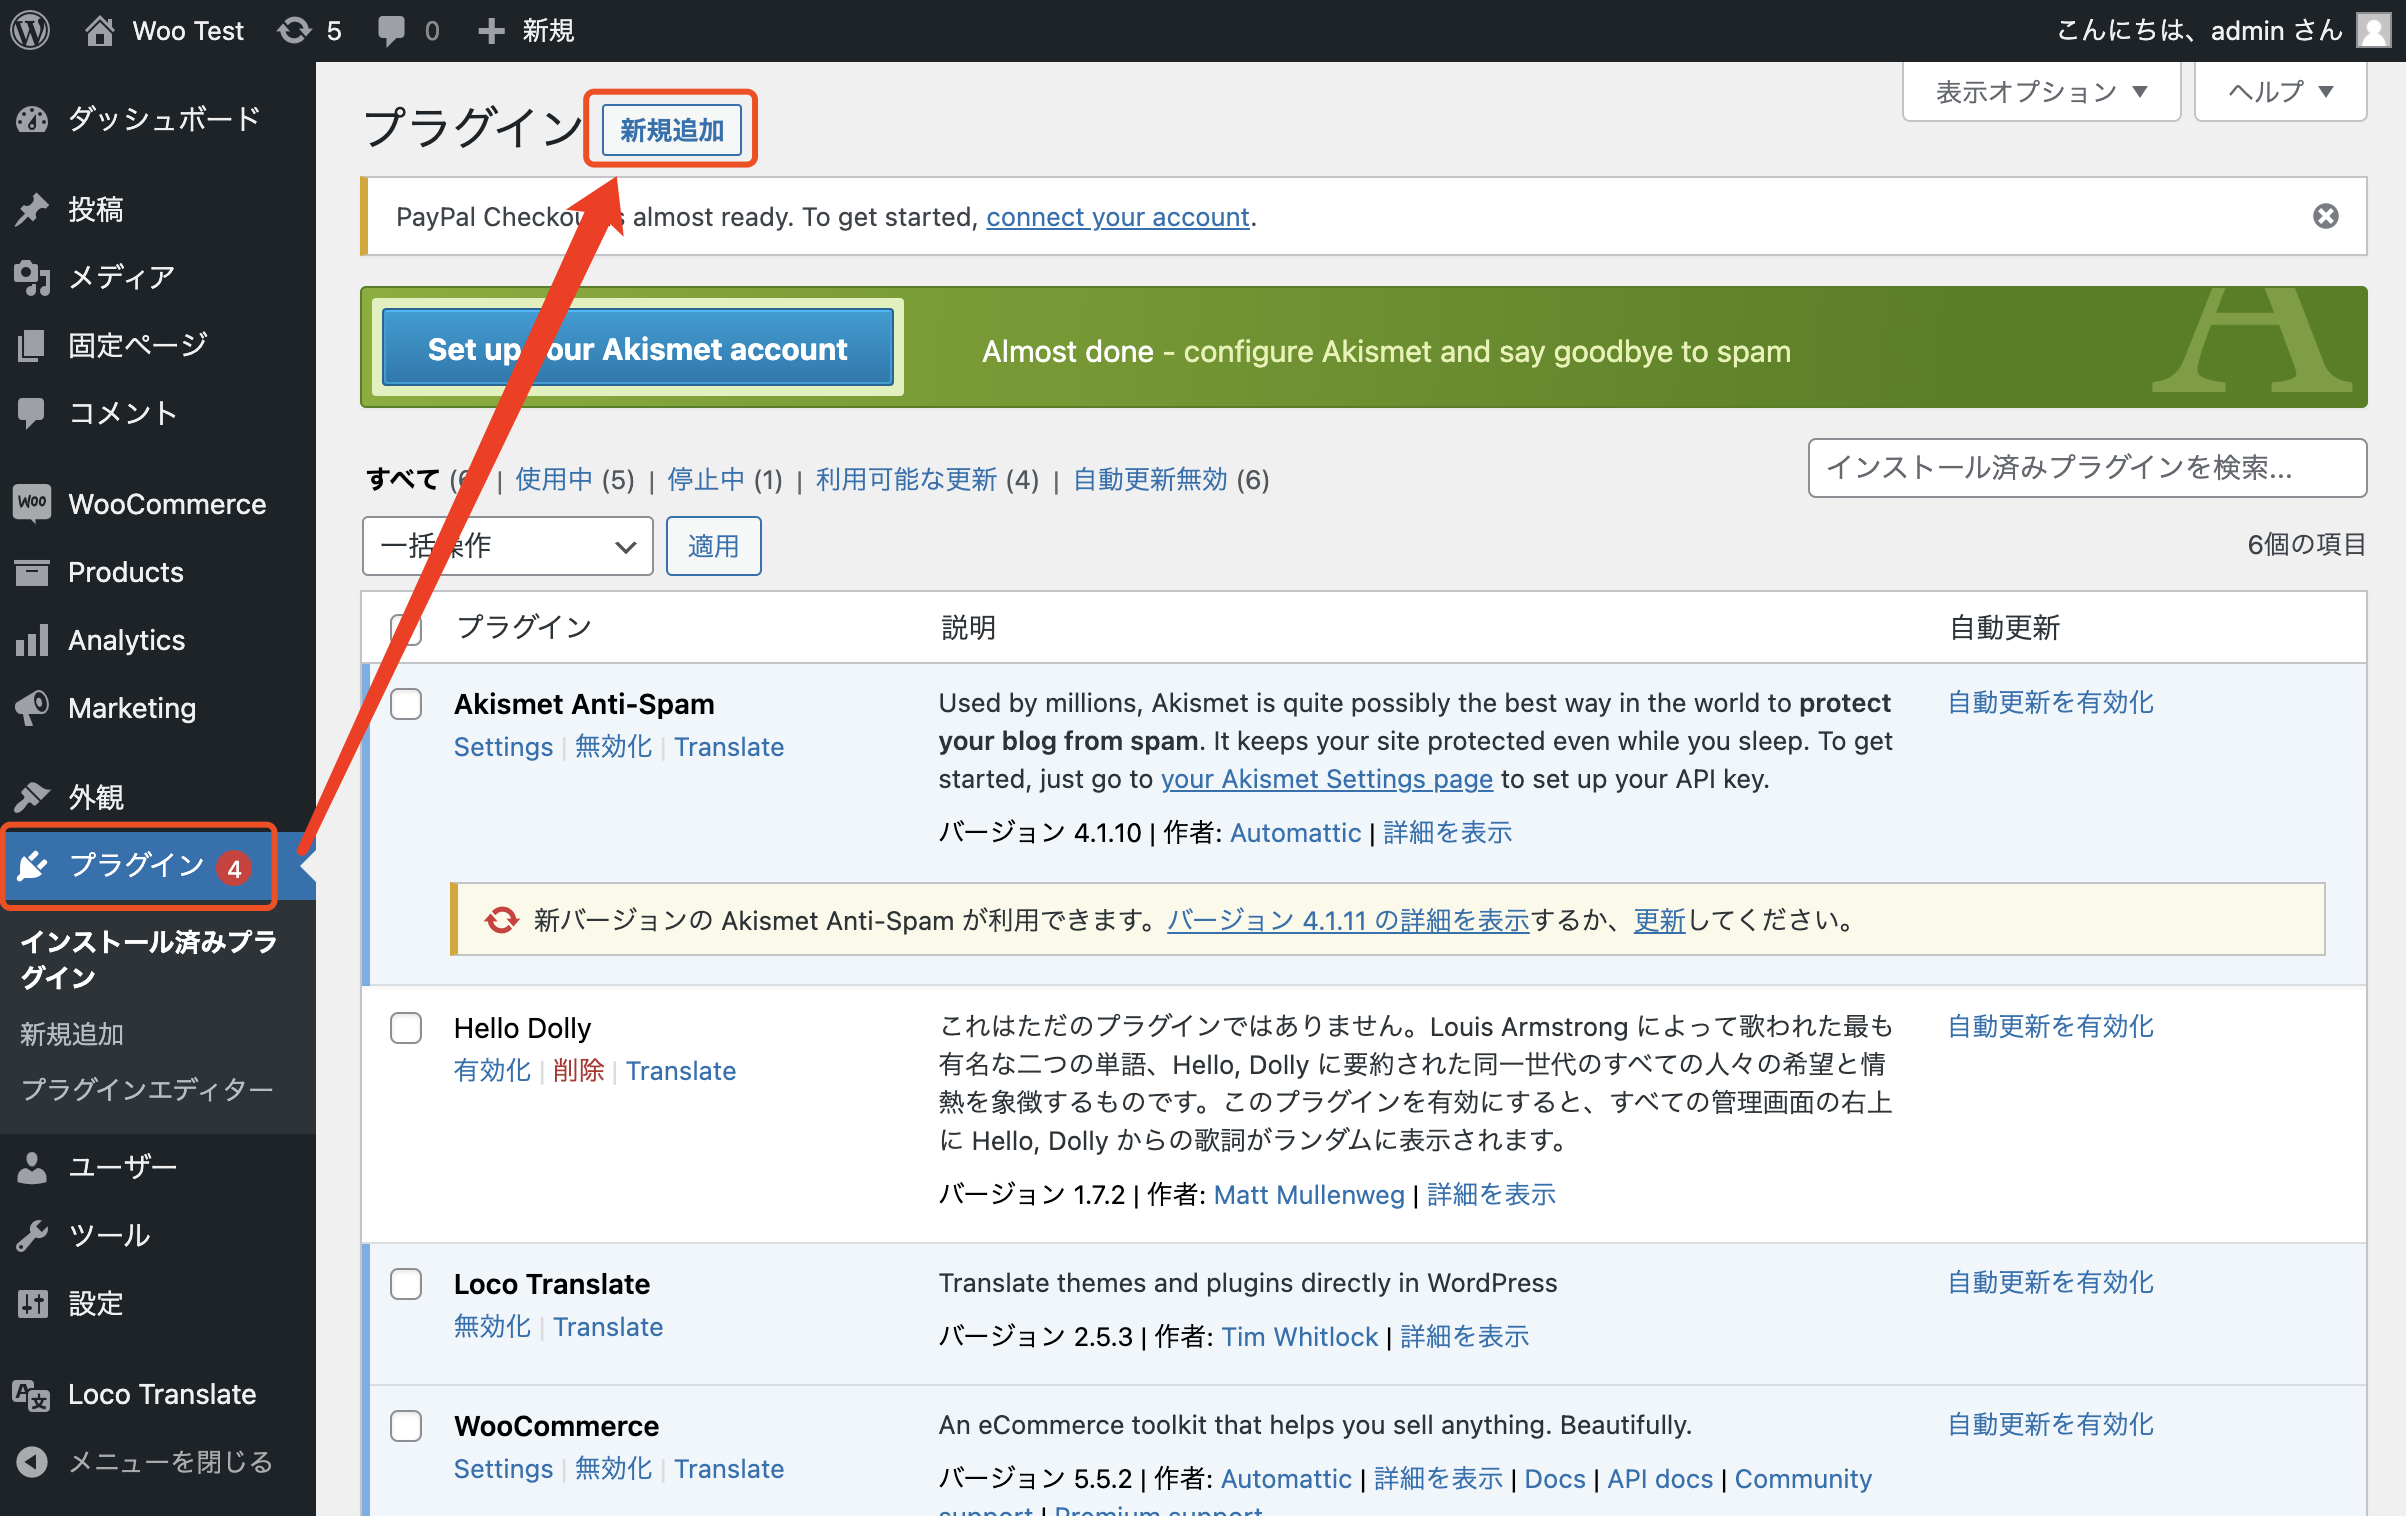
- WordPressの管理画面に、管理者権限でログインしてください。
「プラグイン」→「新規追加」ボタンをクリックしてください。
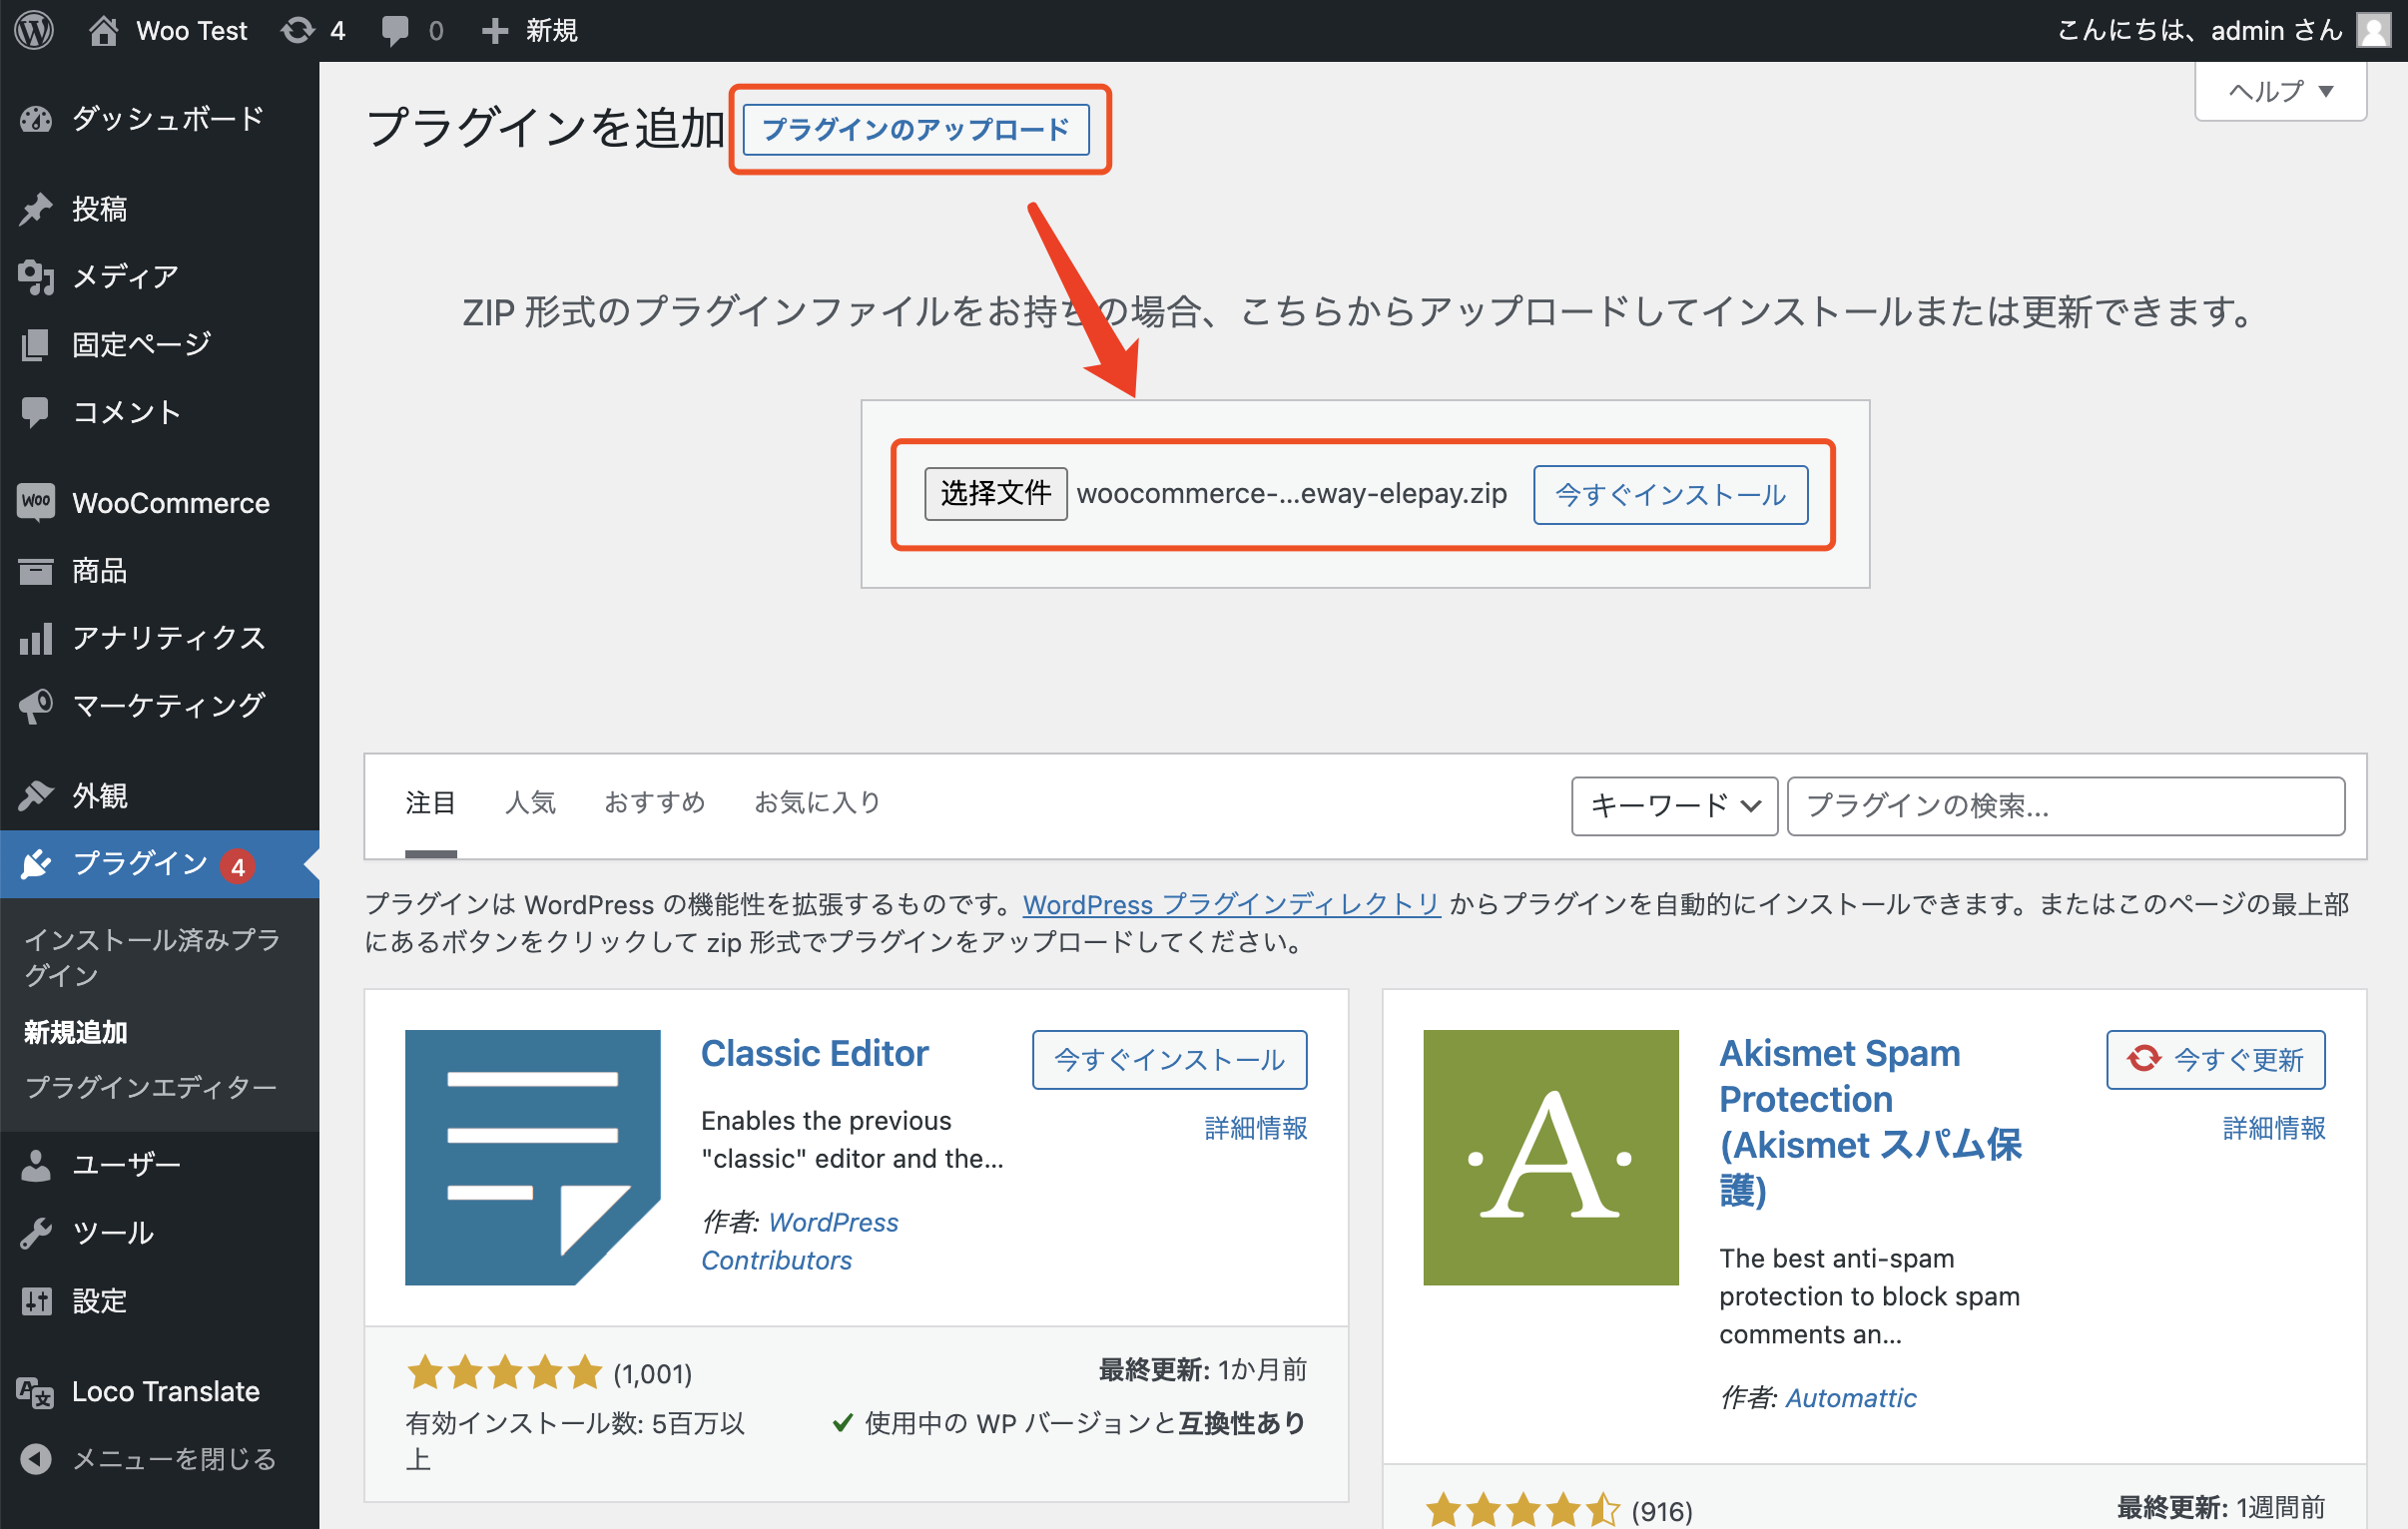
- 「プラグインを追加画面」にて、STEP 1でダウンロードしたzipファイルをアップロードしてください。
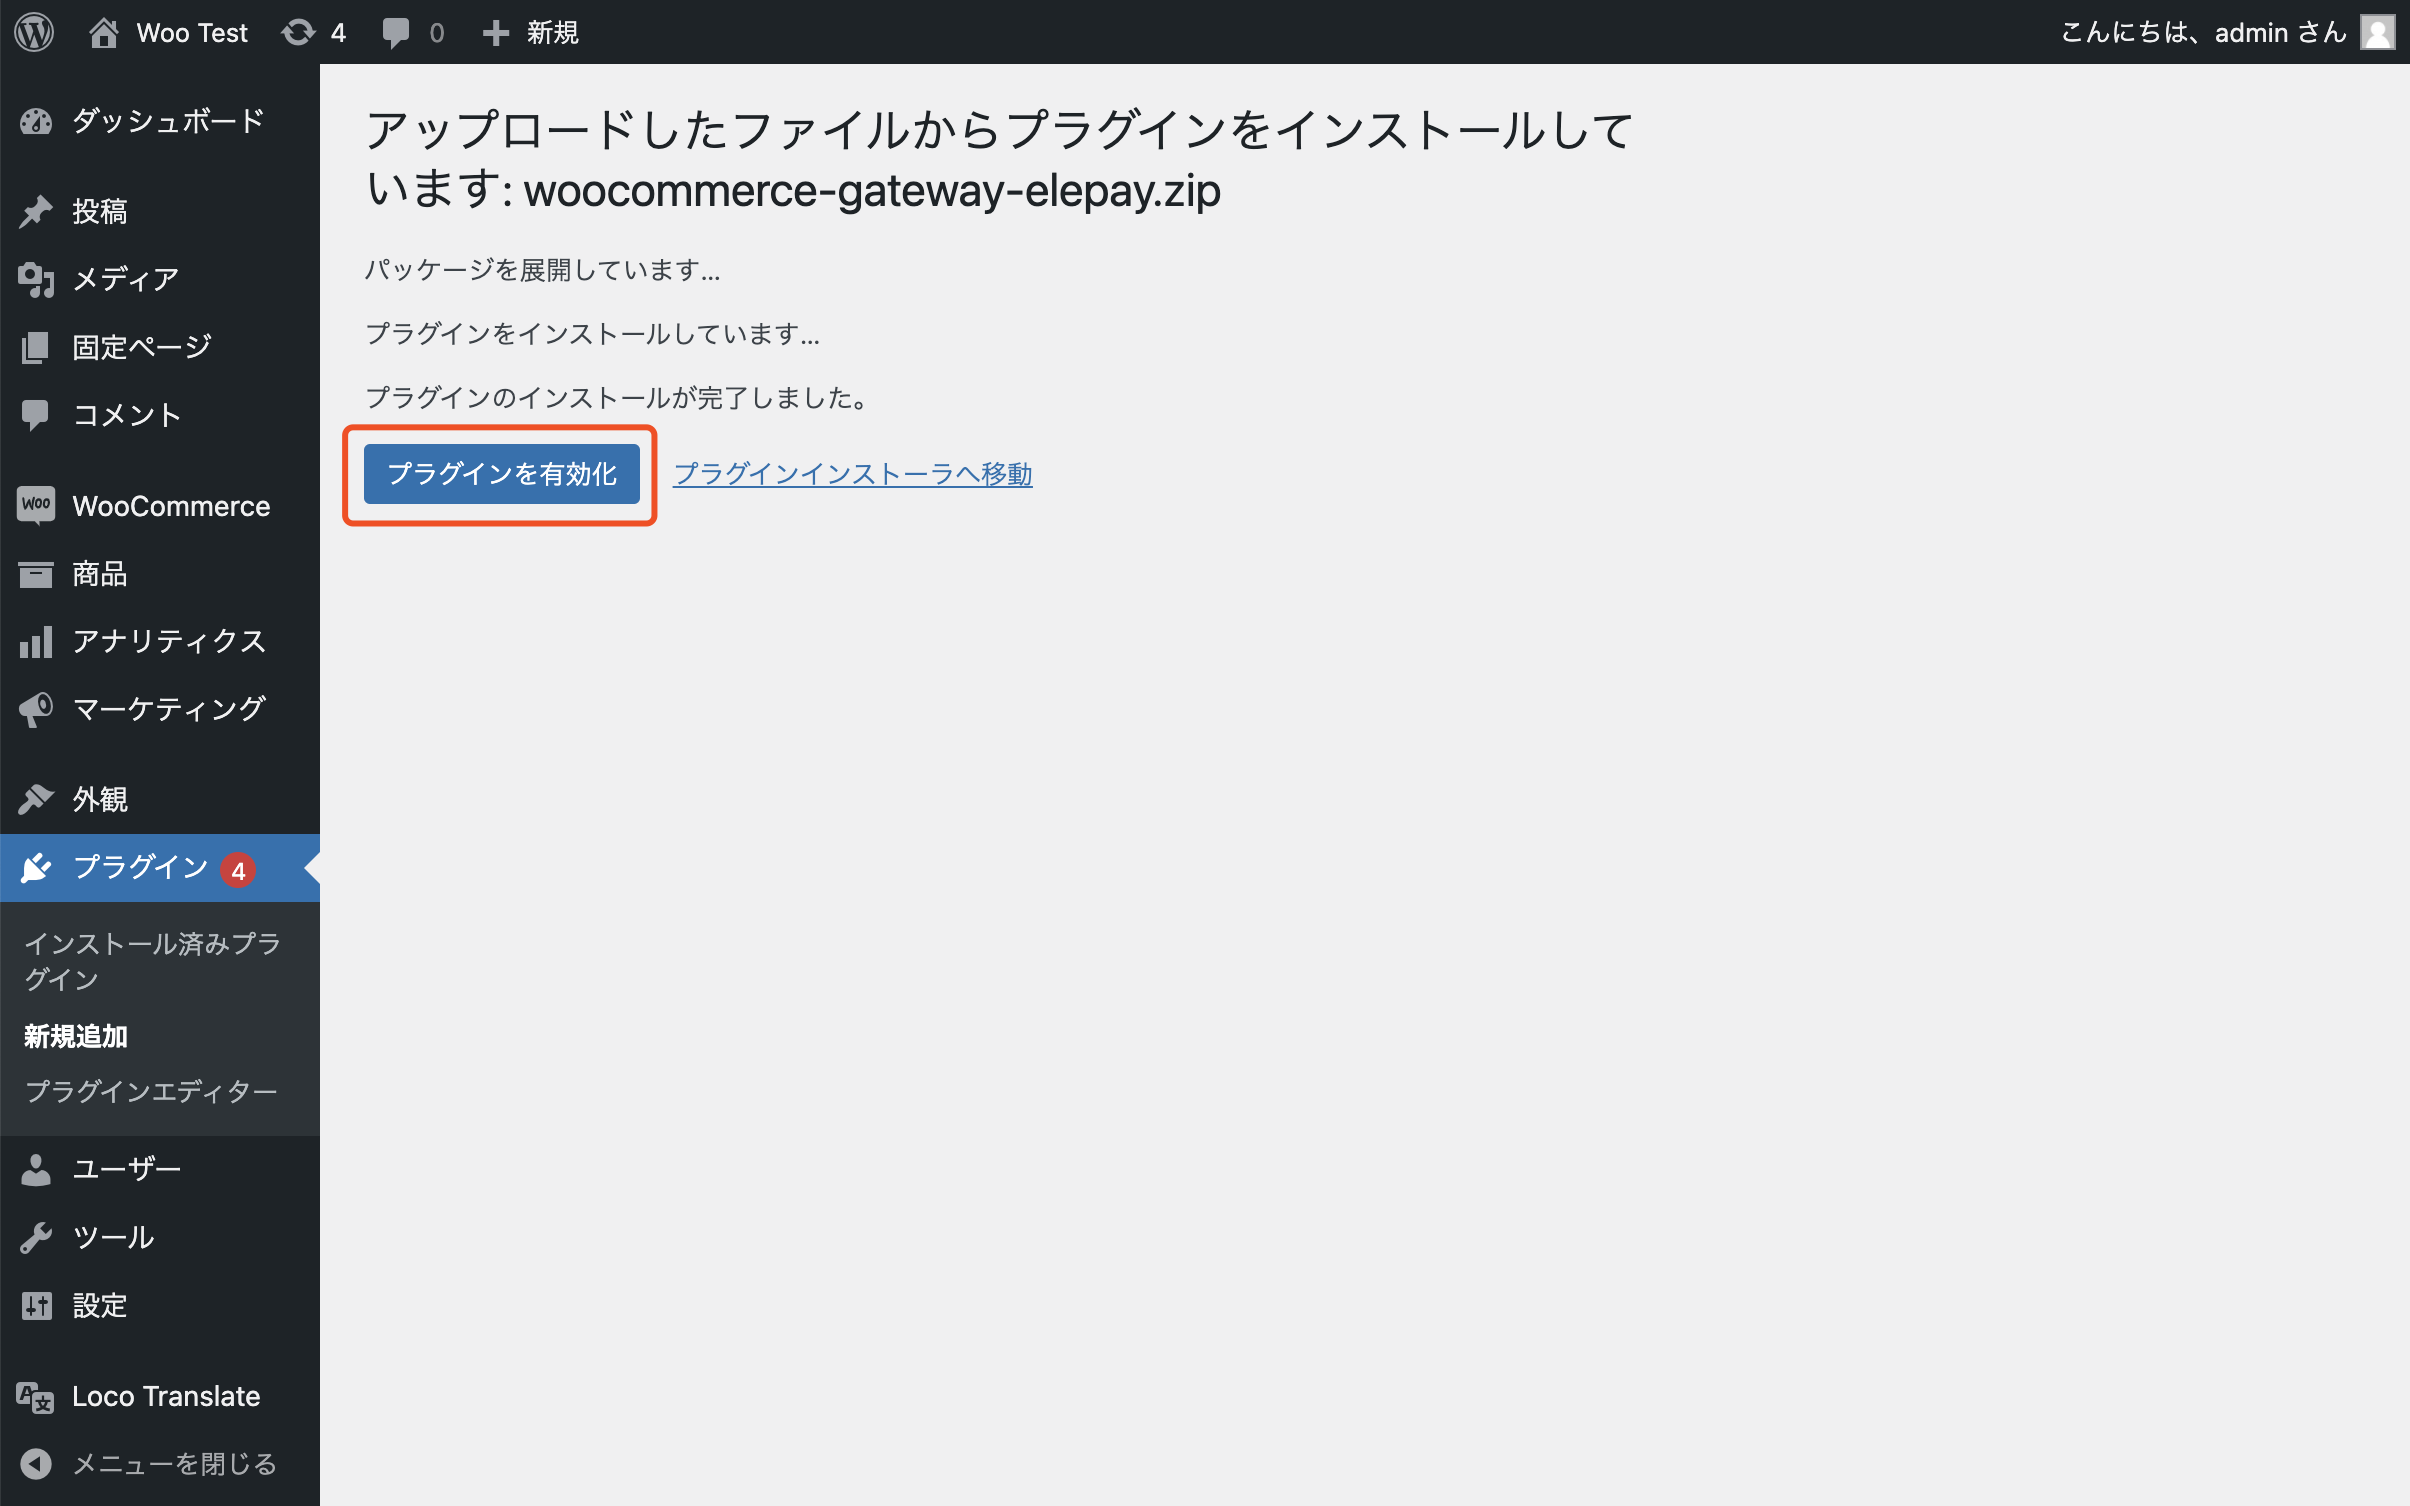
- インストール結果画面にて「プラグインを有効化」ボタンをクリックしてください。
- 「プラグイン」の一覧リストから「elepay Plug-in for WooCommerce」が表示されましたら、利用可能な状態になります。
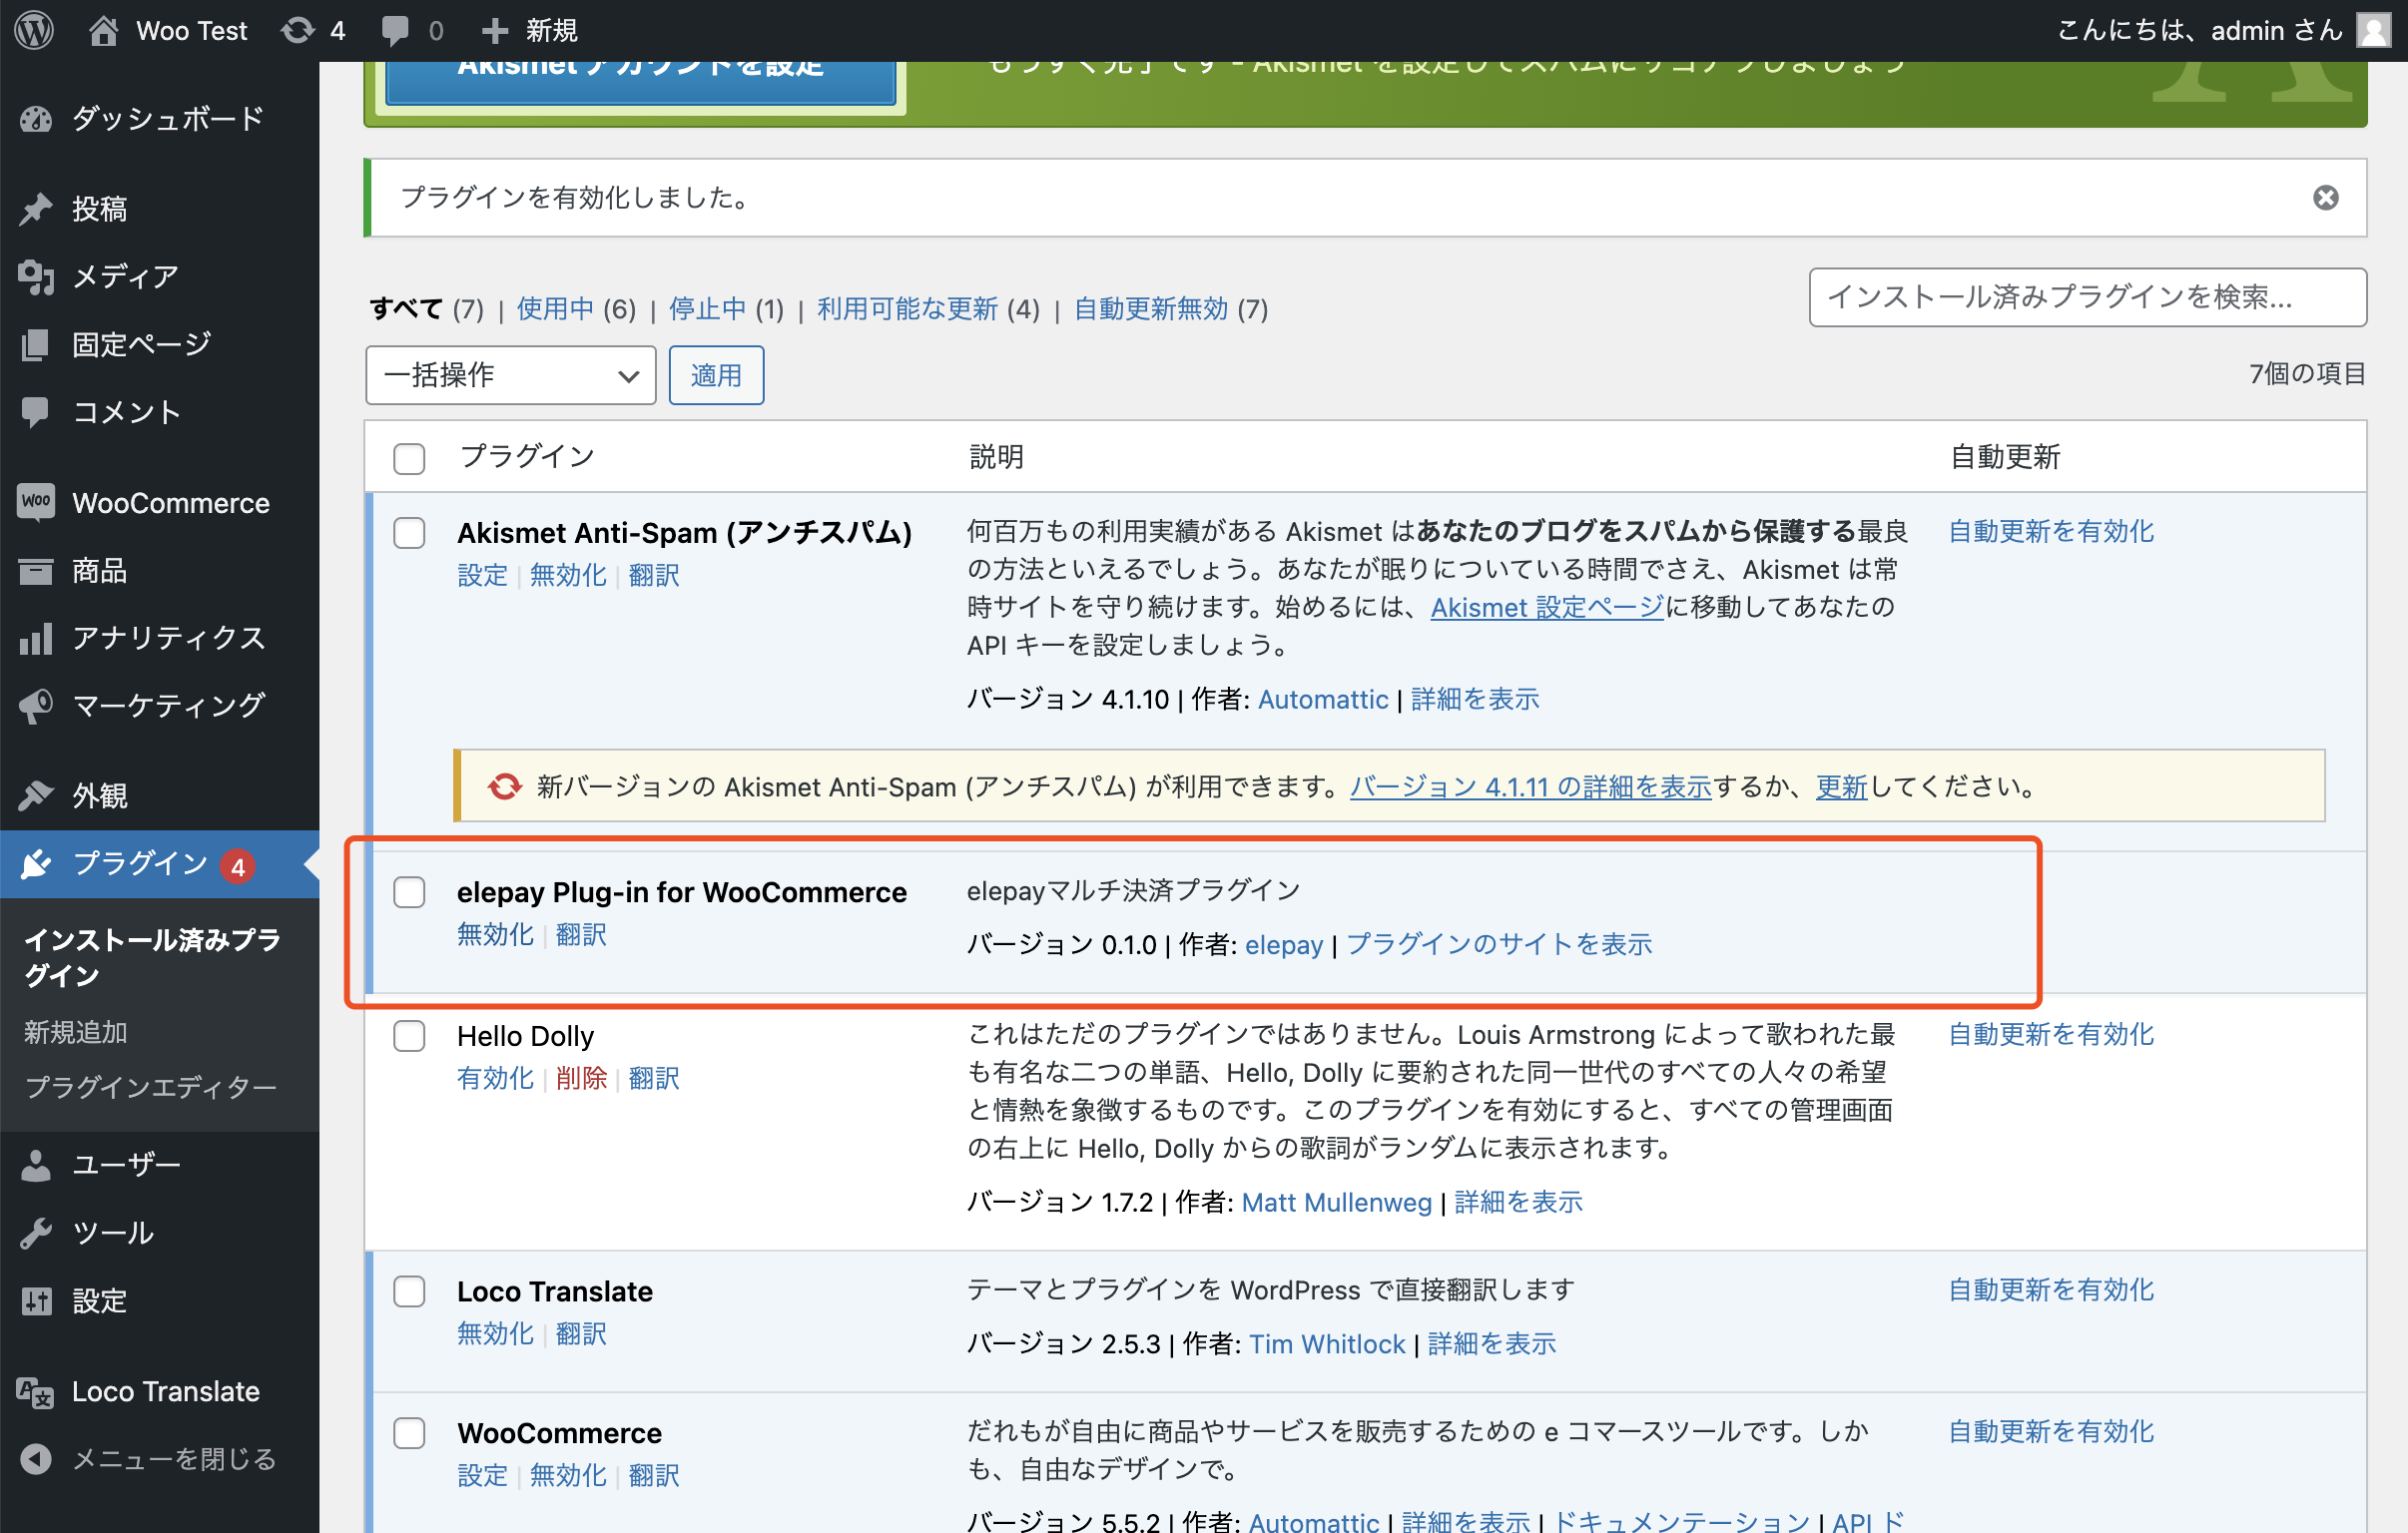
以上でプラグインのインストールが完成しました。
プラグインの初期設定
プラグインの初期設定方法をご紹介します。
- WordPressの管理画面に、管理者権限でログインしてください。
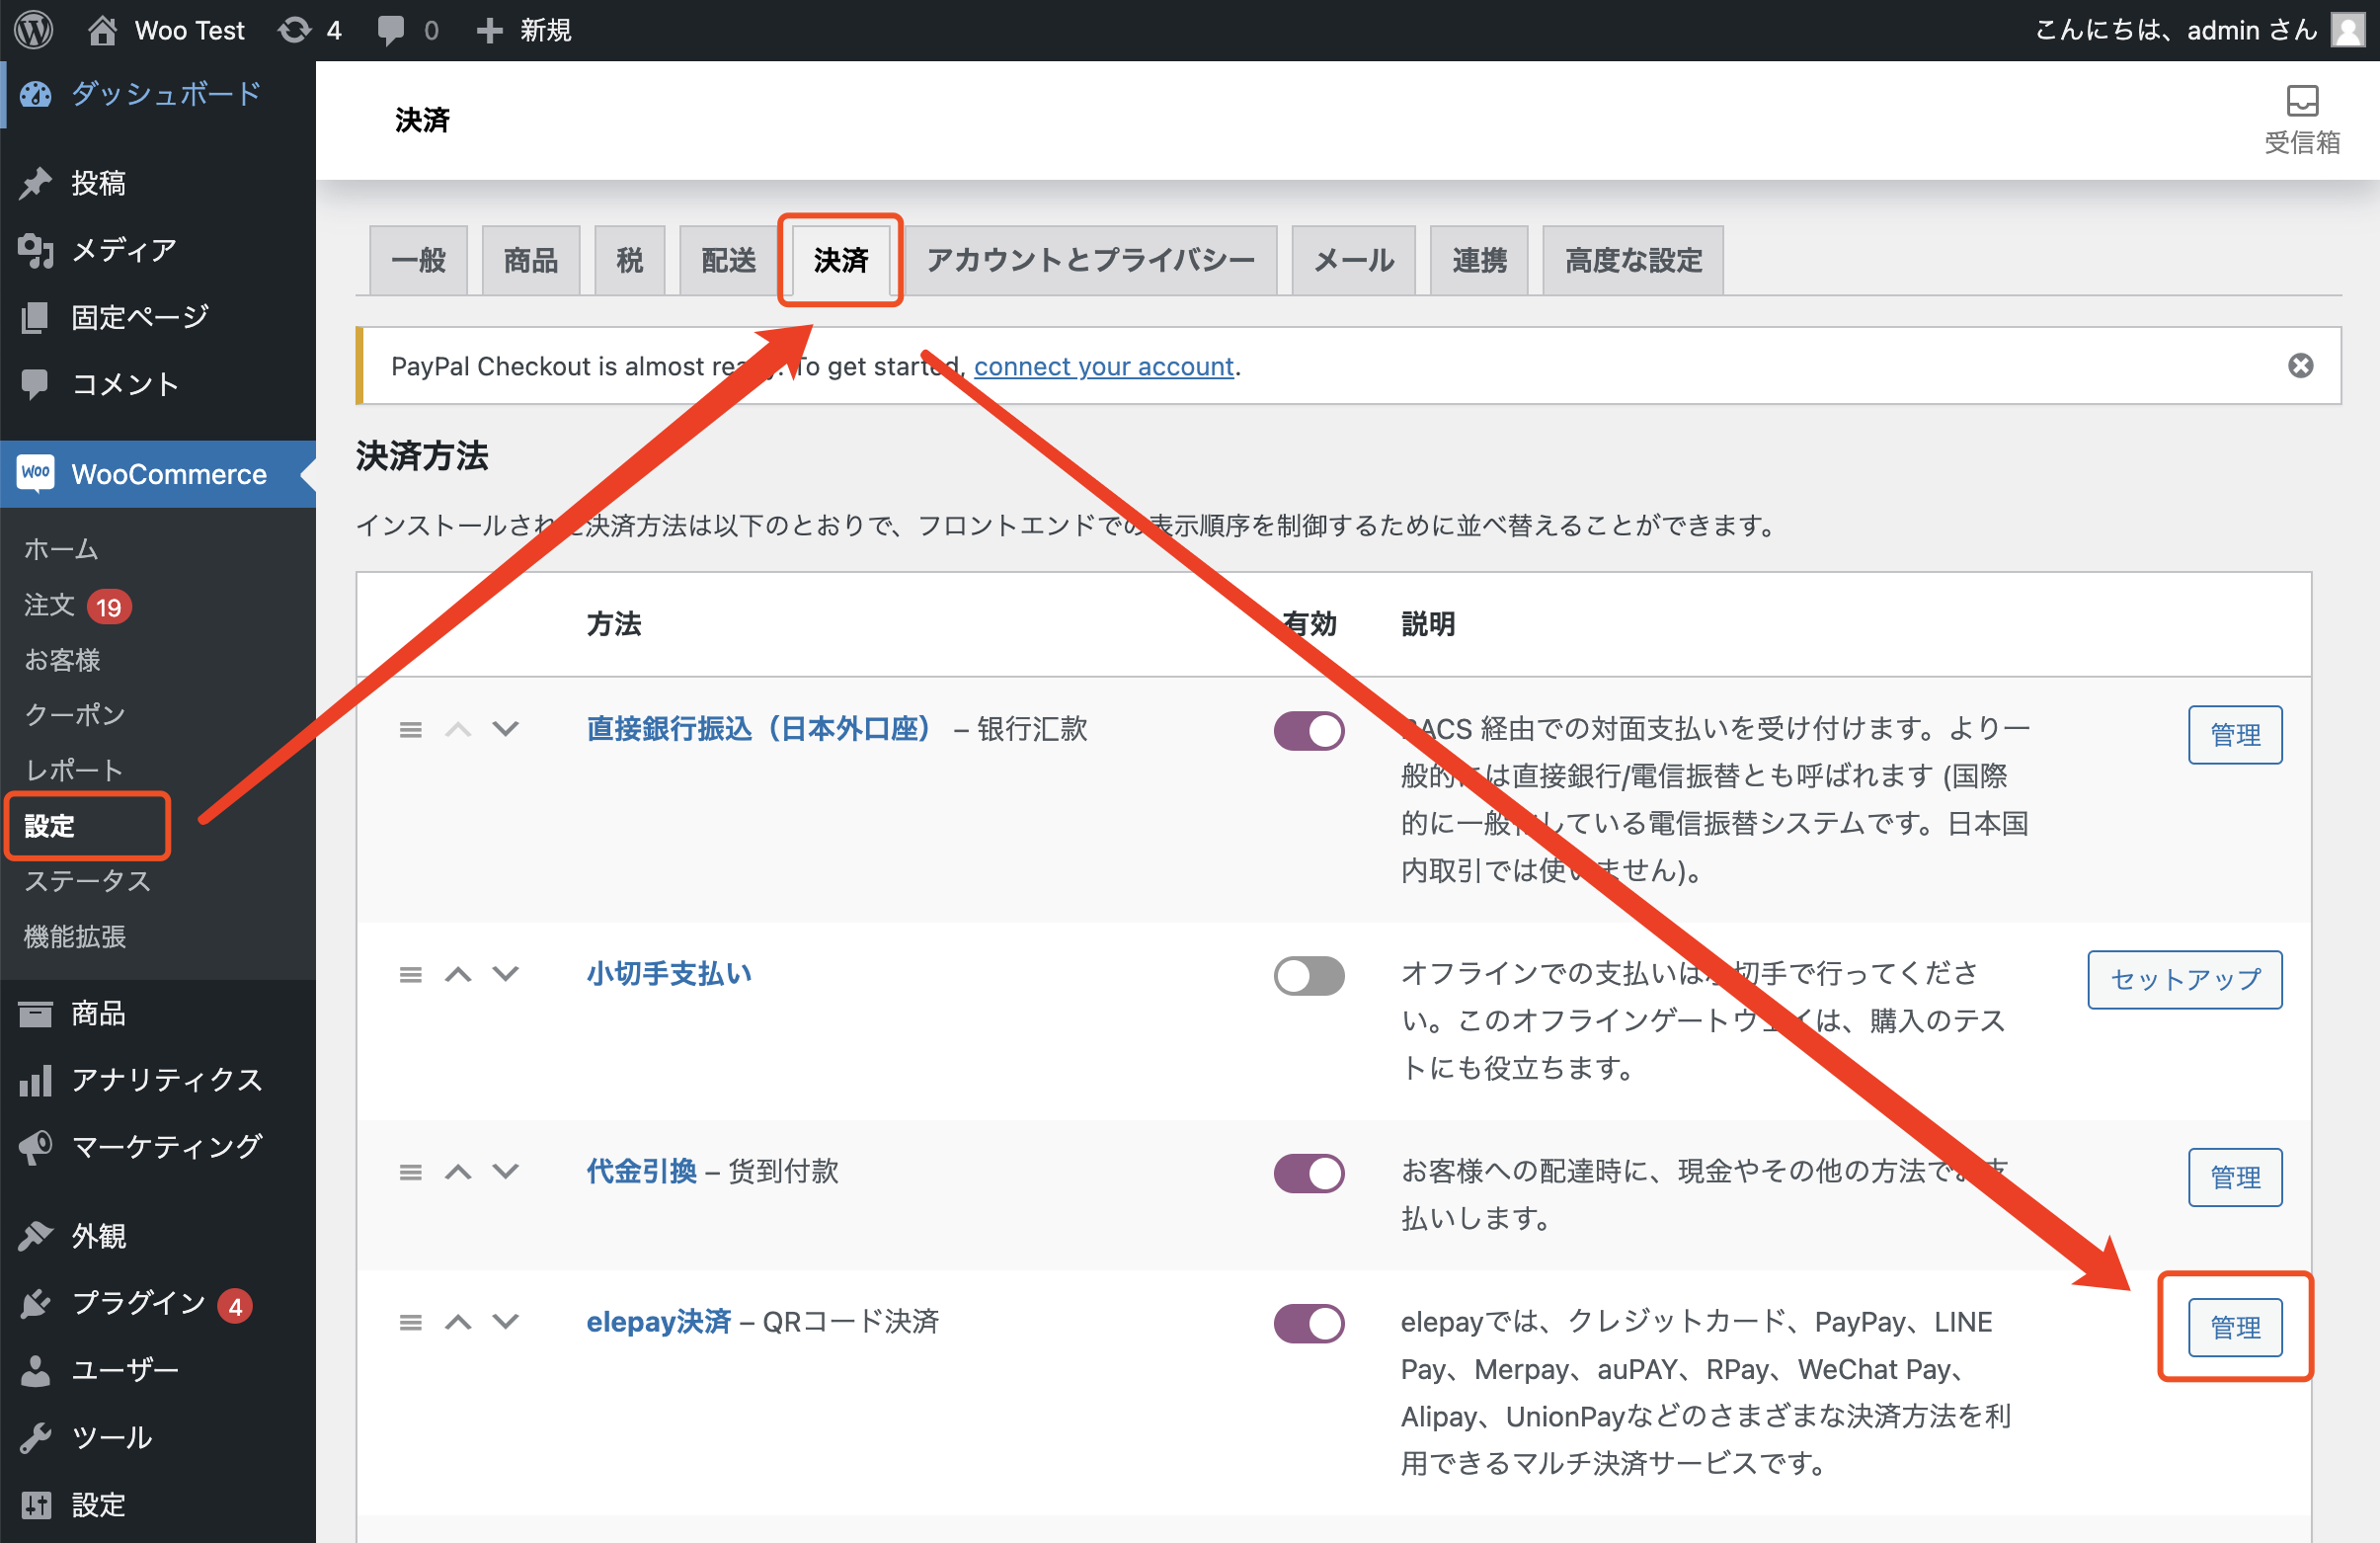
「設定」→「決済」→「elepay決済-QRコード決済」→「管理」をクリックしてください。
-
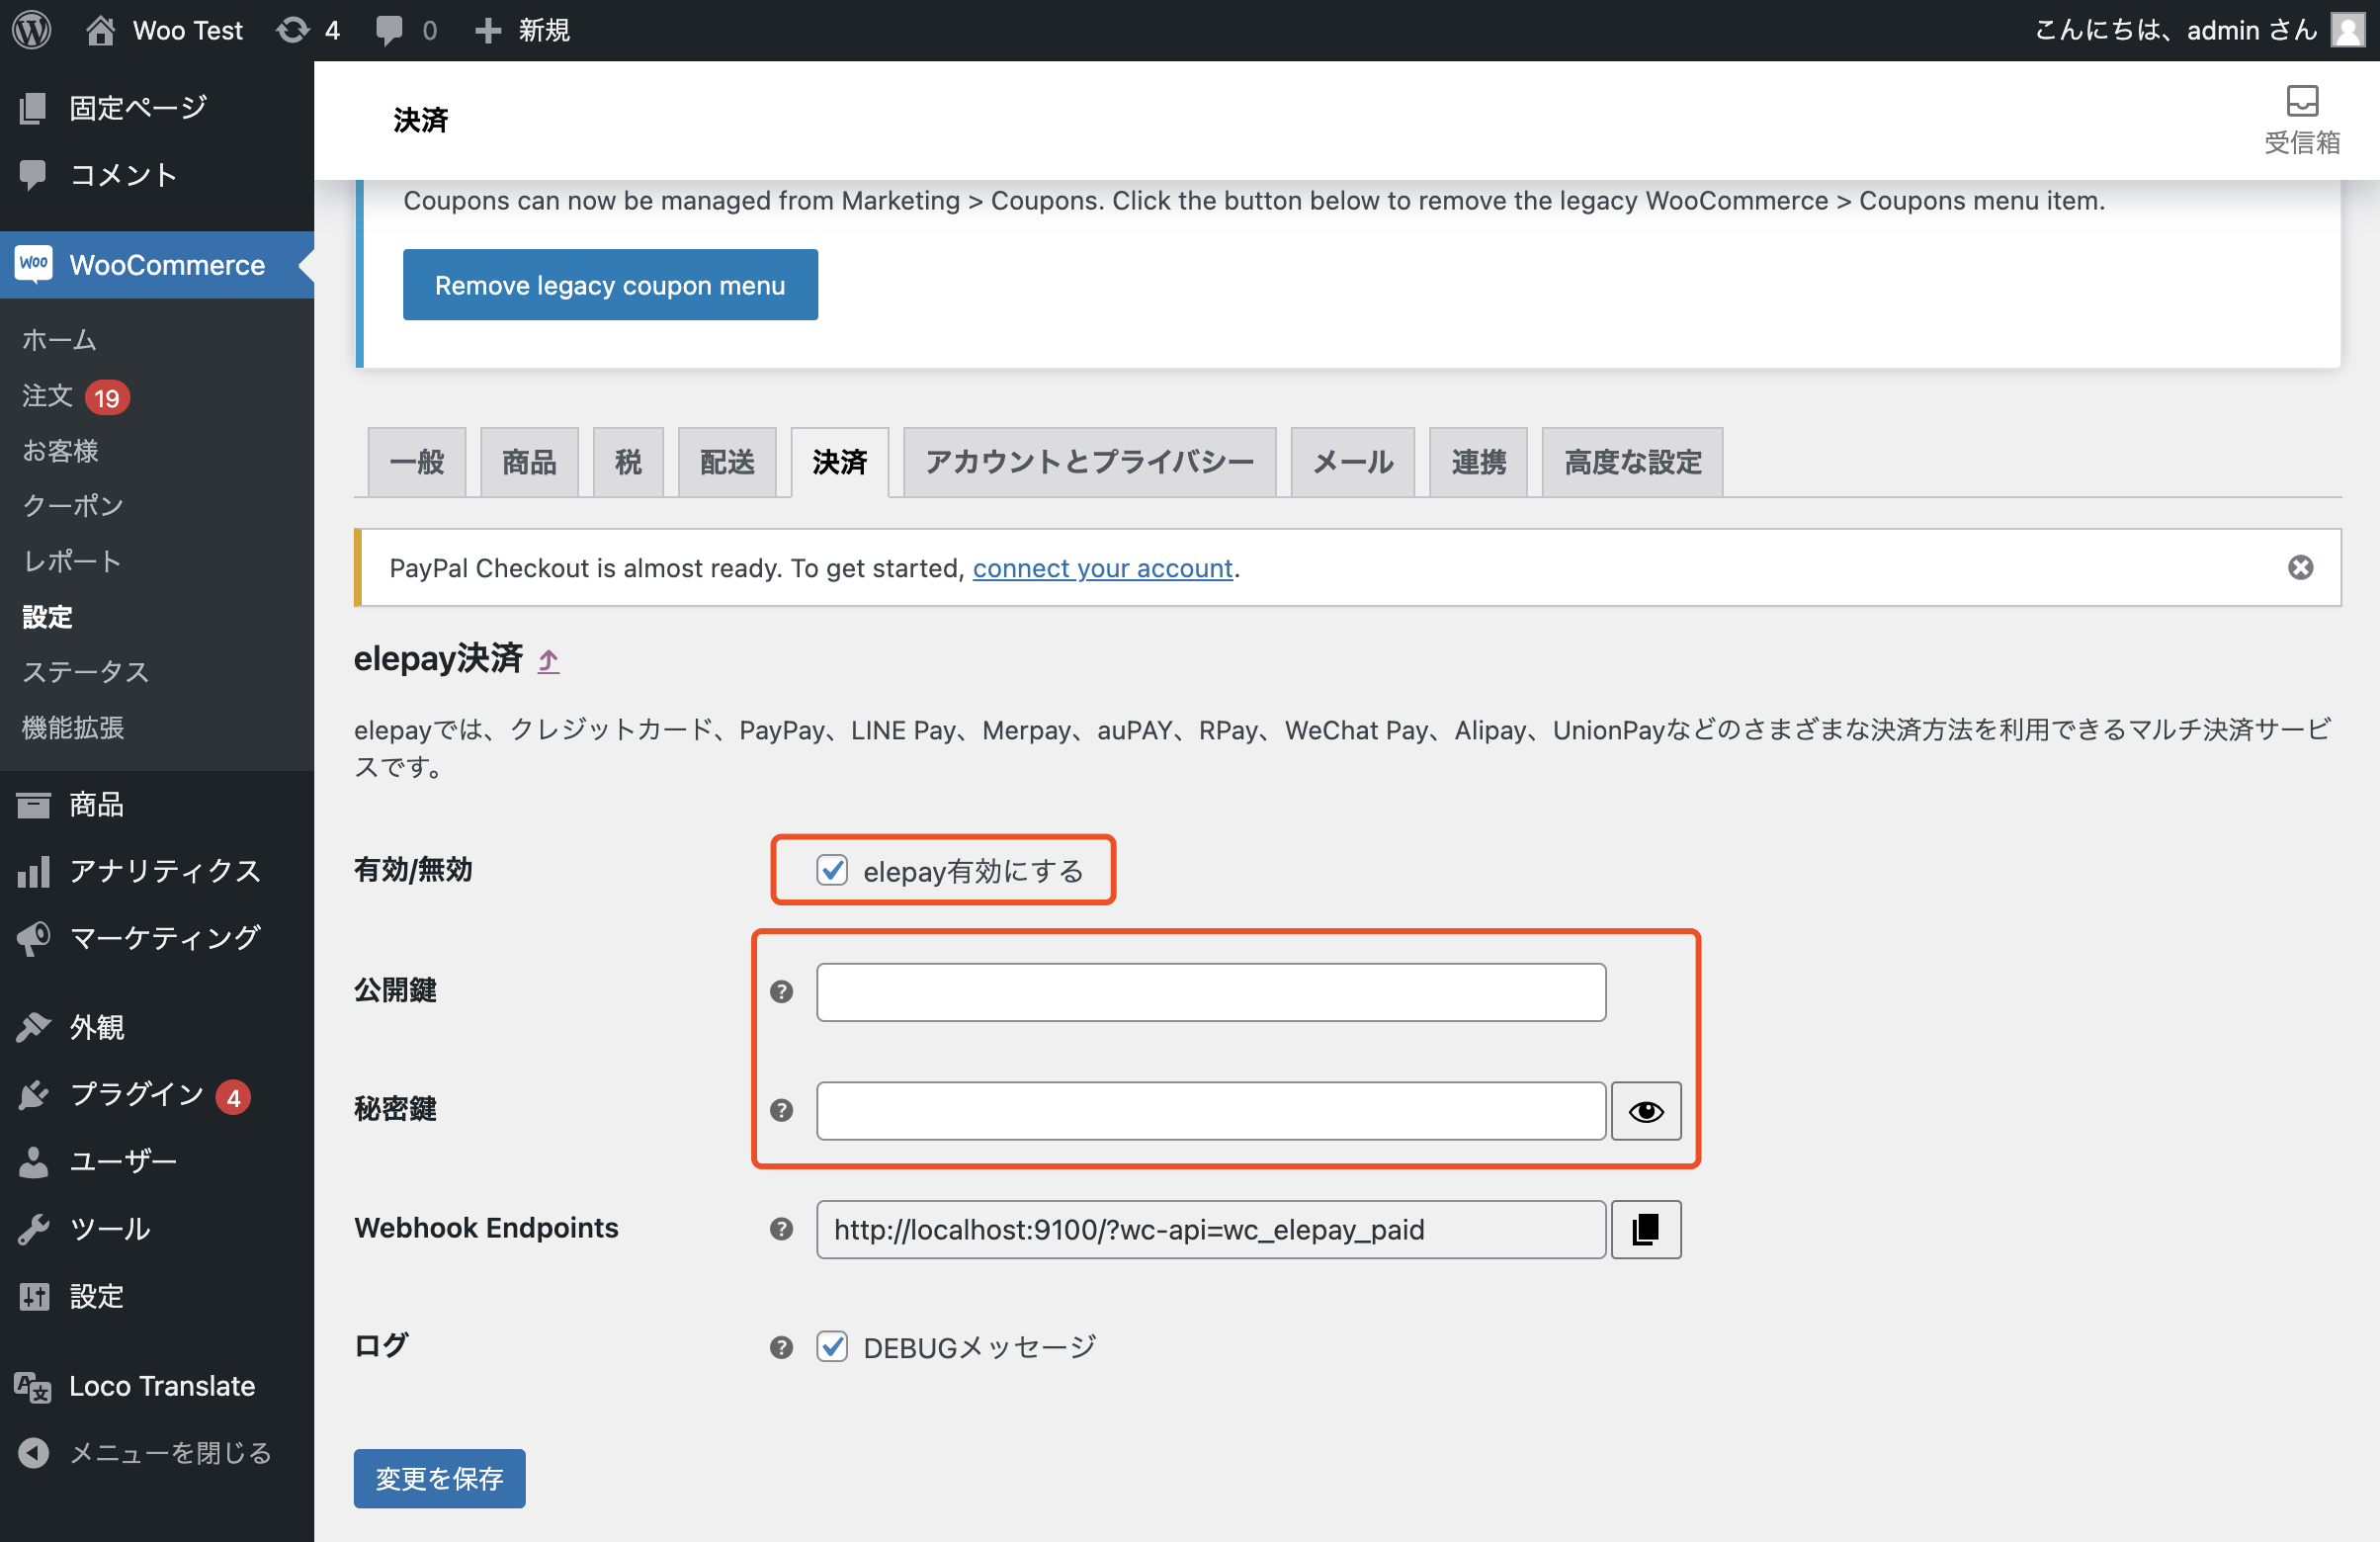
「有効/無効」にて、「elepay有効にする」をチェックして、「公開鍵」と「秘密鍵」に、elepay管理画面から取得した開発キーを入力してください。最後に「変更を保存」ボタンをクリックしてください。
elepay開発キーの入手方法は「概要 」へご参照ください。
❗️ ご注意:テスト環境の開発キー(pk_test、sk_testから始まるキー)をご利用の場合は、実際に決済が行いないため、注文状況に「支払い済み」が表示されていても、絶対に商品を発送しないてください!
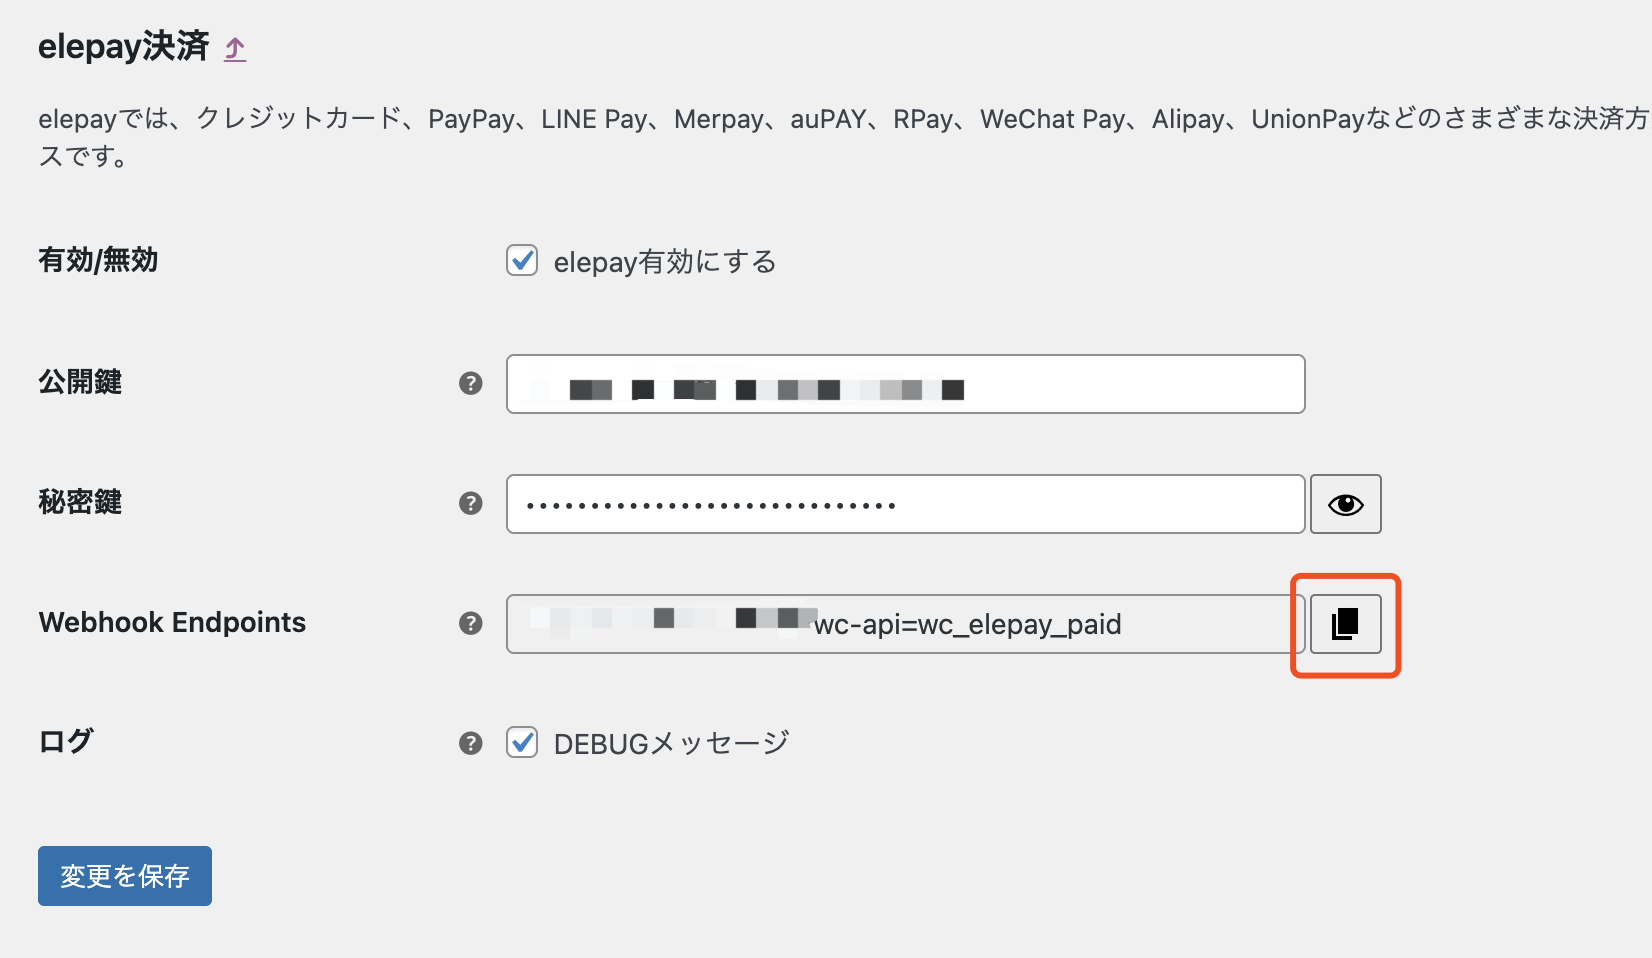
- Webhookリンクをコピーしてください。
- elepay 管理画面の「開発設定」→「Webhook」にて、「新規」ボタンをクリックしてください。
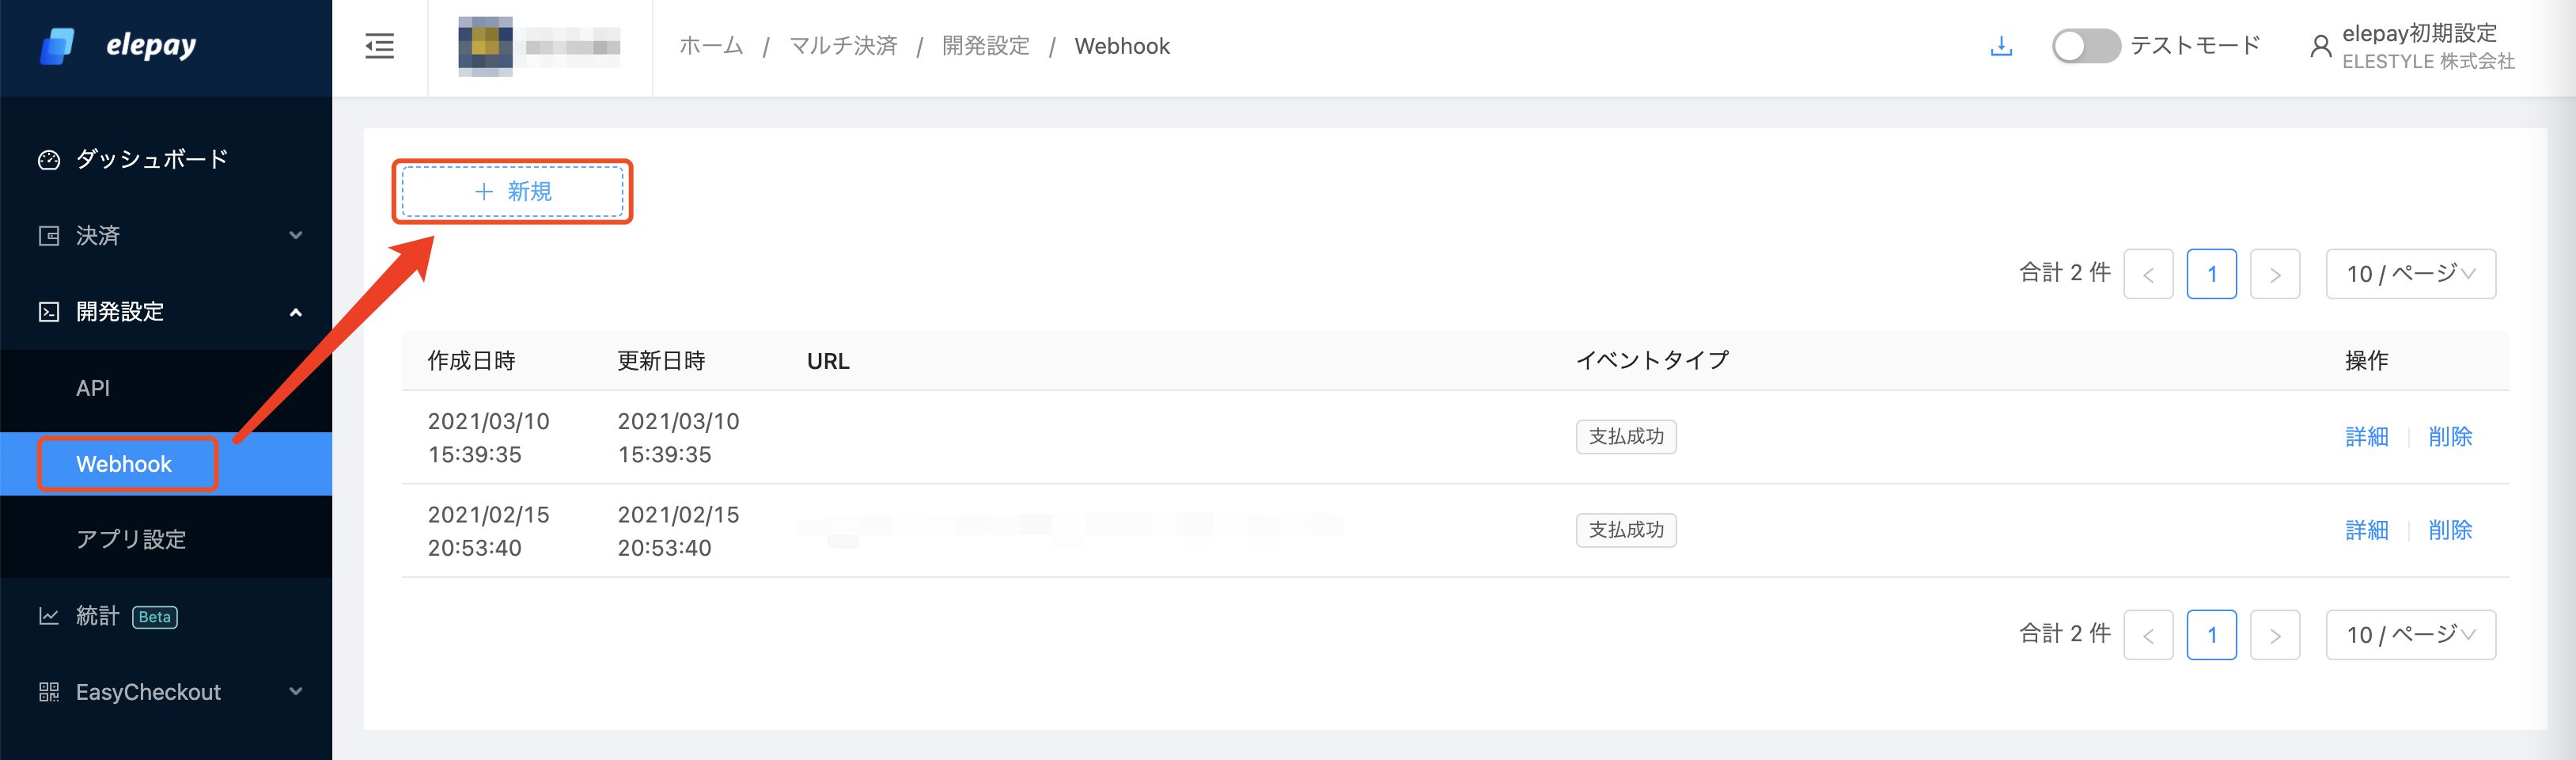
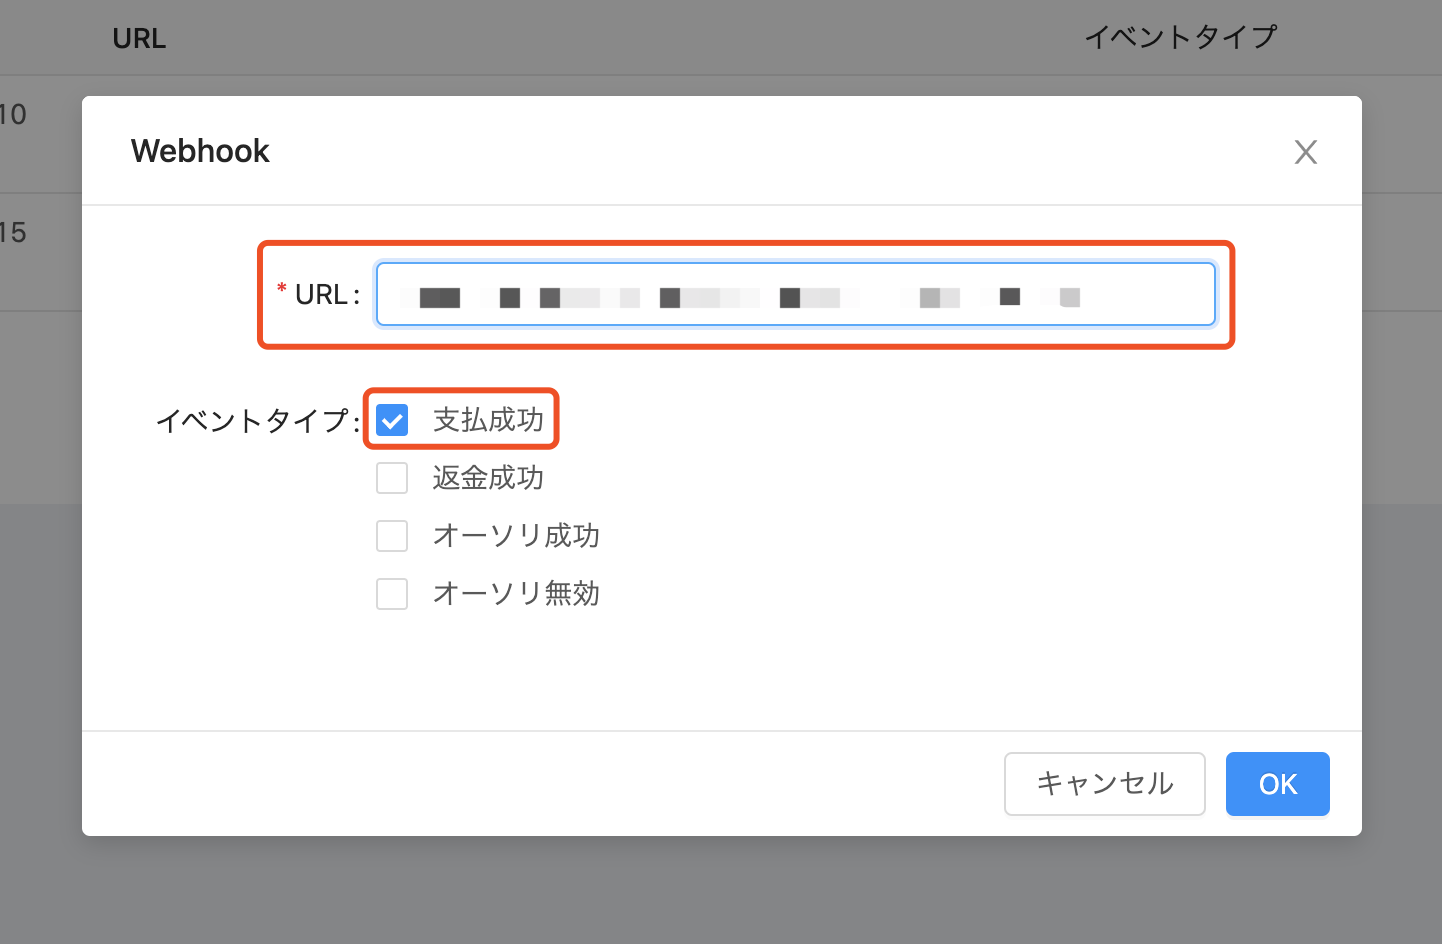
- STEP 3 にてコピーしたWebhookリンクを「URL」にペーストして、下の「イベントタイプ」にある「支払成功」をチェックしてから、「OK」をクリックしてください。
以上で全ての設定が完了しました。
購入者様のEC-CUBEのお支払い方法選択画面から、elepayの決済方法一覧が見れます。
📘 elepayに有効の決済方法のみ表示されます。ブラウザーやデバイスに対応していない決済方法は自動で非表示になります。
最終更新日