ホスティングのCheckout
ホスティングのCheckoutページを導入
お客様がウェブサイトのボタンをクリックすると、elepayホスティングのCheckoutページに移動します。
- 導入工数:ローコード、約20分
- 実装スタイル:ホスティングページ
- UIの自由度:制限あり
サイト内で商品を選択済みのお客様が、購入準備が整ったら、以下の手順で導入してください。
ステップ1:選択された商品用のEasyQRコードを作成します
Checkoutページを設定
「Create EasyQR code」のコード例:
--data '
{
"currency": "JPY",
"extra": {
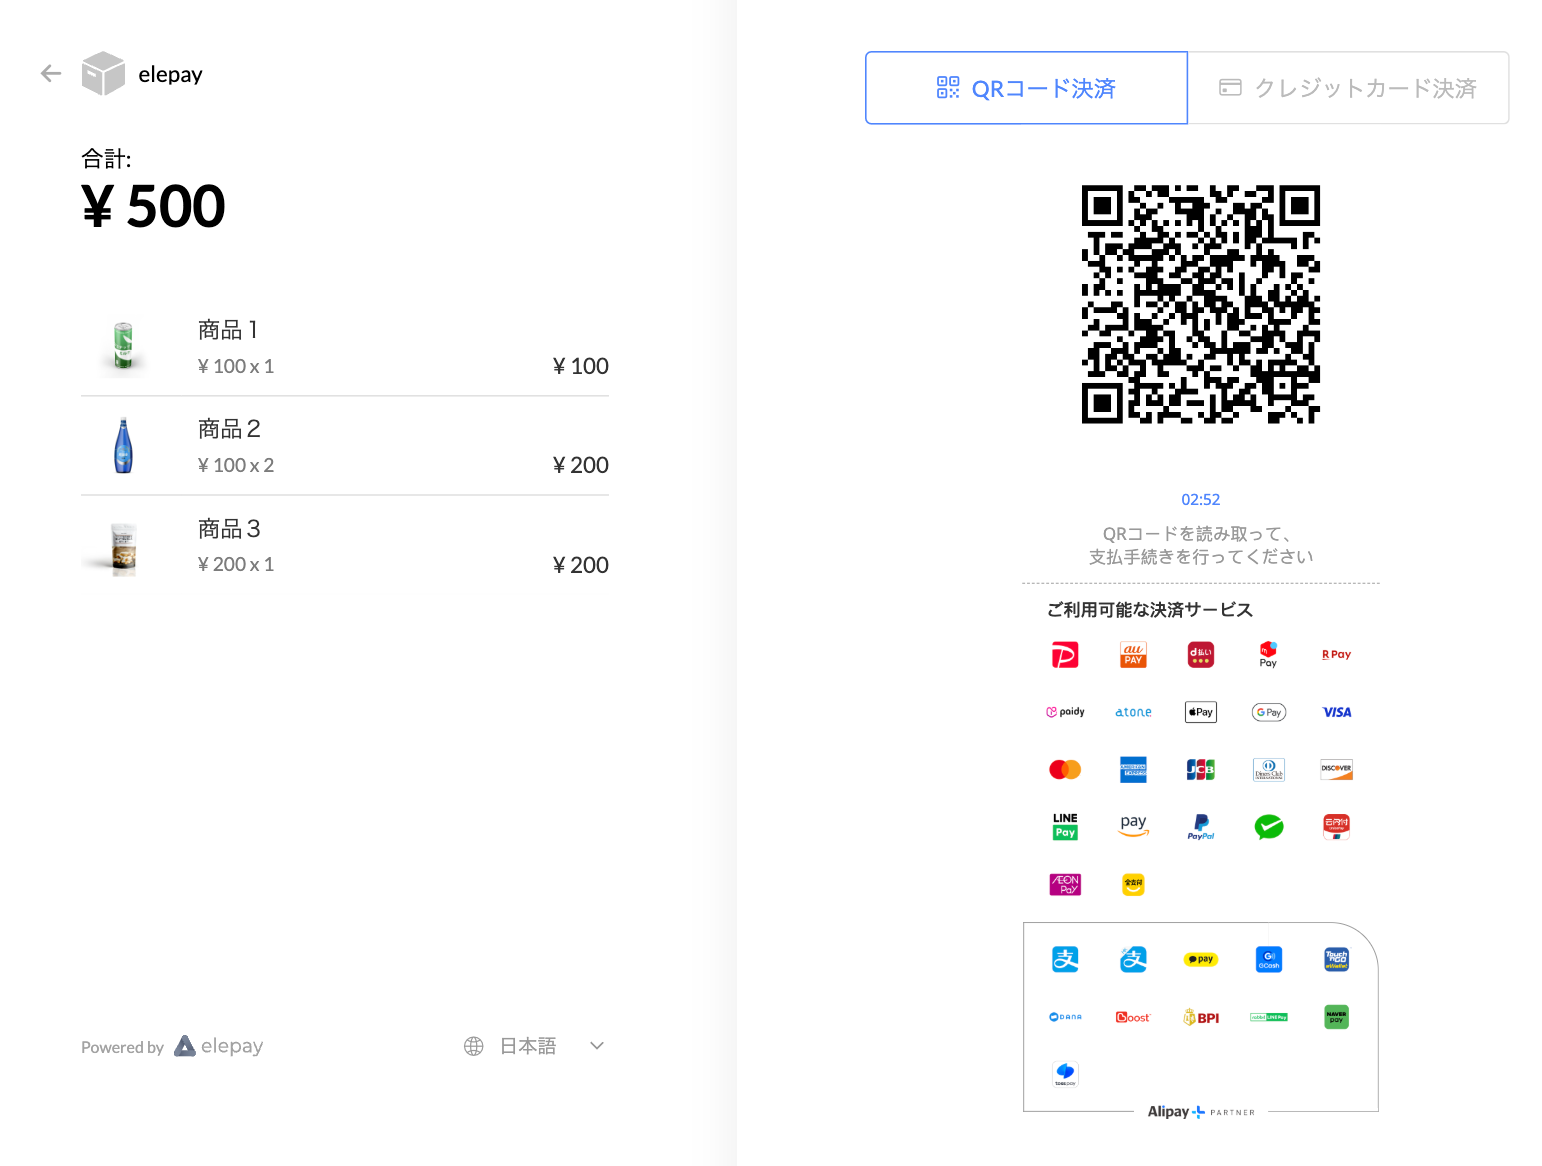
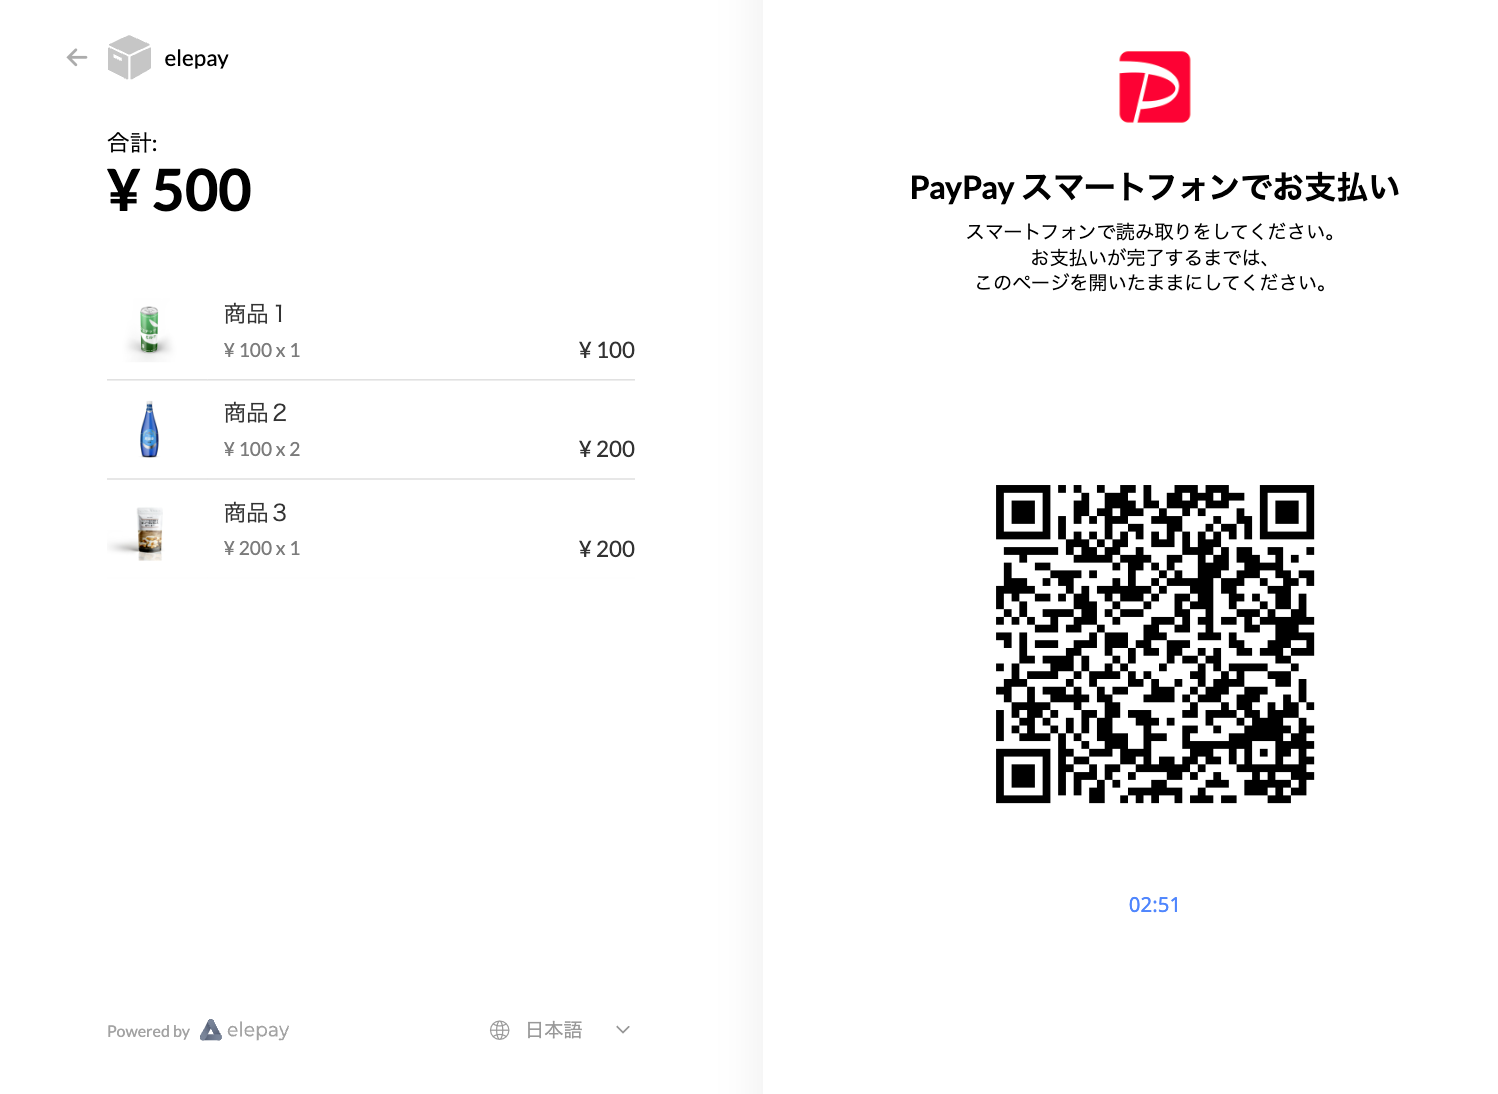
"defaultPaymentMethod": "paypay" # 特定ブランドの決済QRコード
},
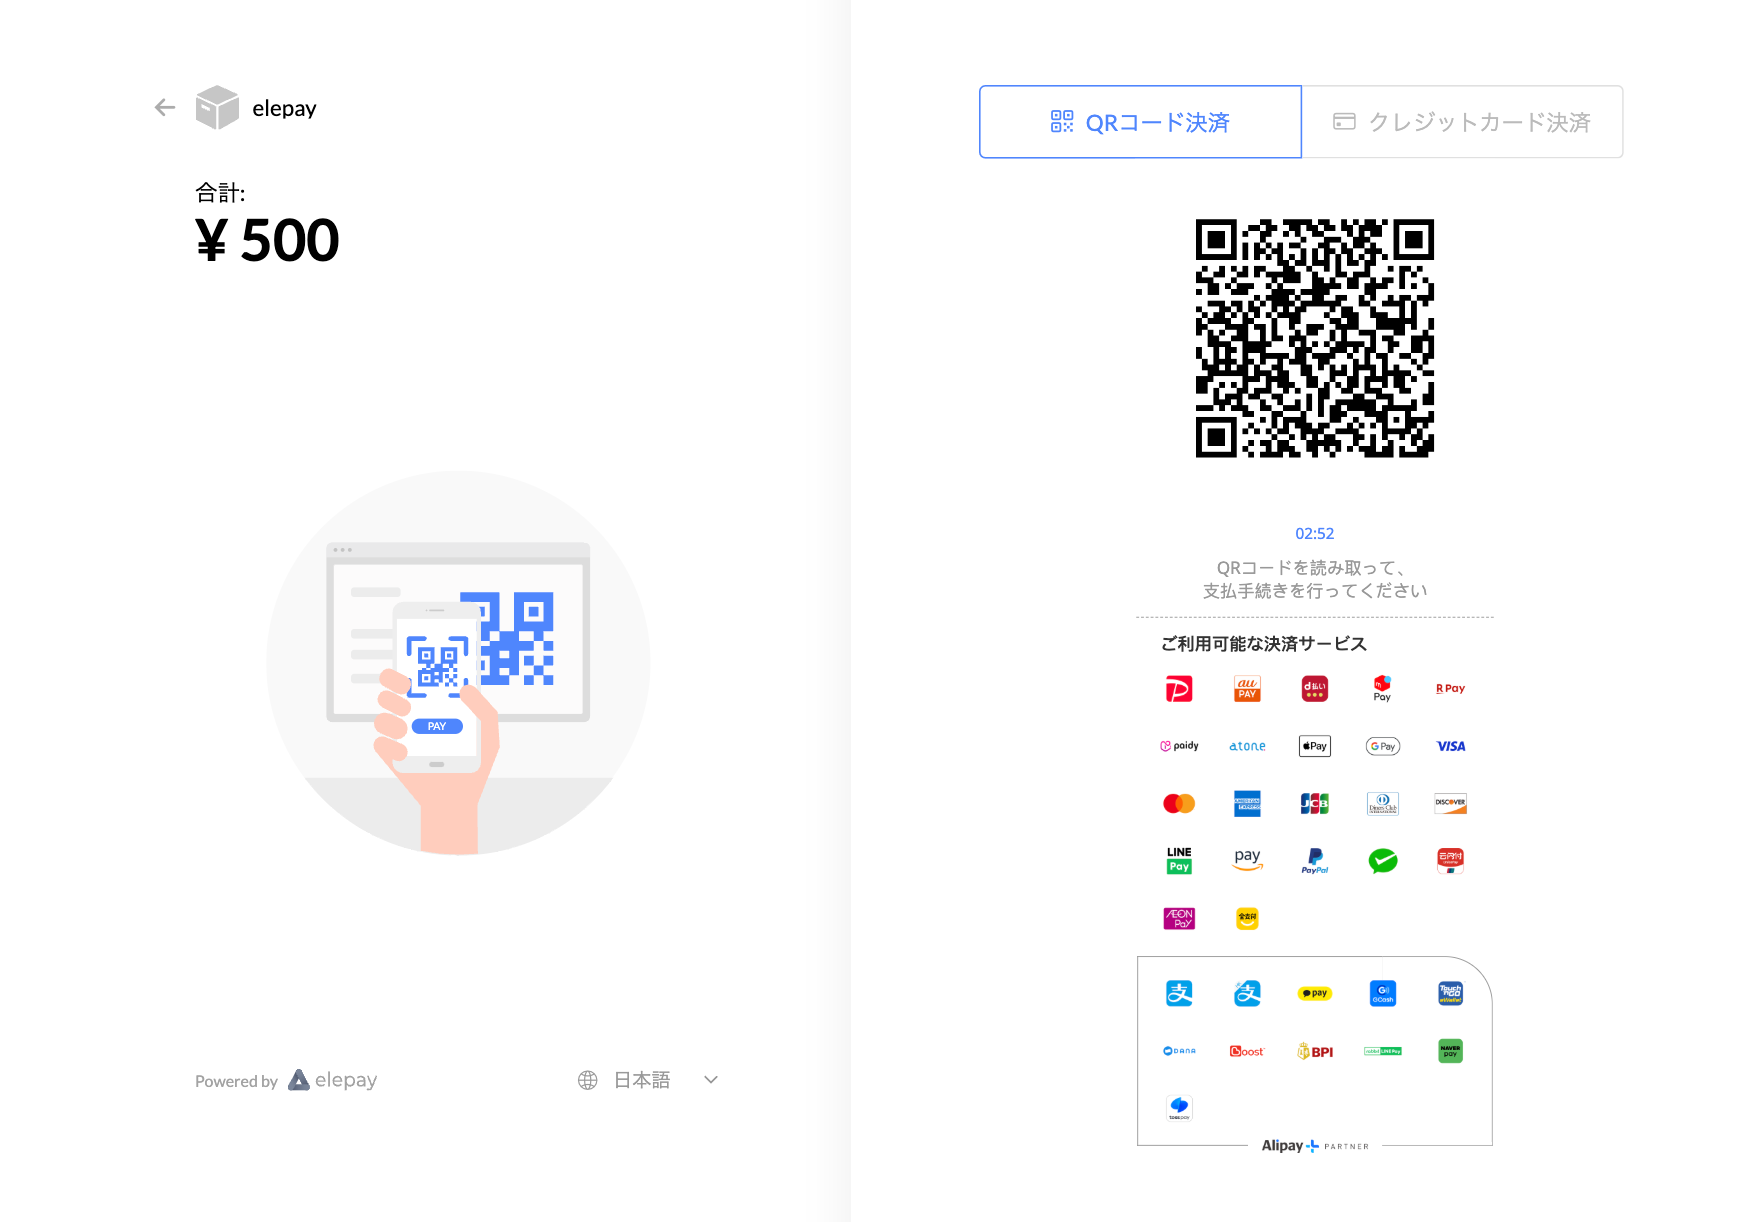
"amount": 266, # 合計金額を表示
"items": [ # 各商品の詳細を表示
{
"name": "お茶",
"price": 108,
"count": 1
},
{
"name": "コーラ",
"price": 158,
"count": 1
}
]
}
'
| 各商品の詳細を表示 | 合計金額のみを表示 | 特定ブランドの決済QRコード |
|---|---|---|
 |  |  |
ステップ2:サイトに支払いボタンを追加し、お客様をCheckoutページへ移動
Javascript SDKを利用して、Checkoutページへ移動します。Javascript SDKは自動的端末の種類を判断して、デスクトップの場合はCheckoutページへ、モバイルの場合はPaymentページへ移動します。
<script src="https://js.elepay.io/v1/elepay.js"></script>
<script>
  var elepay = new Elepay("<公開鍵>")
  elepay.checkout("<QRCode ID>")
</script>
ステップ3:お客様が支払いを完了し、遷移ページと支払い状況を処理
決済処理後、リダイレクト時に支払いステータス(例:status=captured)が付加され、フロント側で処理の成否を判断できます。
- captured: 支払完了
- cancelled: 支払キャンセル
- failure: 支払失敗
👍 決済状況を正確に把握するためには、Webhookでイベント通知を受信する方法が最適です。
elepay の[開発設定>Webhook] で受信URLを設定できます。
支払いが成功の場合、elepay は Webhook に設定された URL に
charge.capturedイベントの通知を送信します。
他の設定
CheckoutページのUIカスタマイズ
お客様が見るCheckoutページは、elepayの[簡単決済>設定>基本設定] でアイコンやカラースキームなどを調整できます。
決済方法の設定
elepay の[簡単決済>設定>決済方法管理] で利用可能な決済方法の管理(確認・有効化・無効化)が可能です。今後追加される支払い手段も、すぐに利用できます。
ロケーション情報を追加
EasyQRコードの作成時にロケーション情報を追加できます。また、elepayの[ロケーション]で管理可能です。
最終更新日